Quick start

In this tutorial, we'll show you how to proxy web traffic through the Earendil network using the earendil GUI.
If you haven't already, install the GUI from the Installation section.
Configure + start Earendil
All of earendil's configuration options are specified in a YAML config file, located in the "Settings" tab of the GUI.

Paste this config file into your Settings tab:
By default, Earendil exposes a Socks5 proxy server on localhost:30003 that will proxy traffic through Earendil.
Now, start the daemon by pressing "Start" in the bottom tray. Go to the "Logs" tab, and you should see earendil's logs appearing.

You're all connected on the Earendil side!
Connect your browser
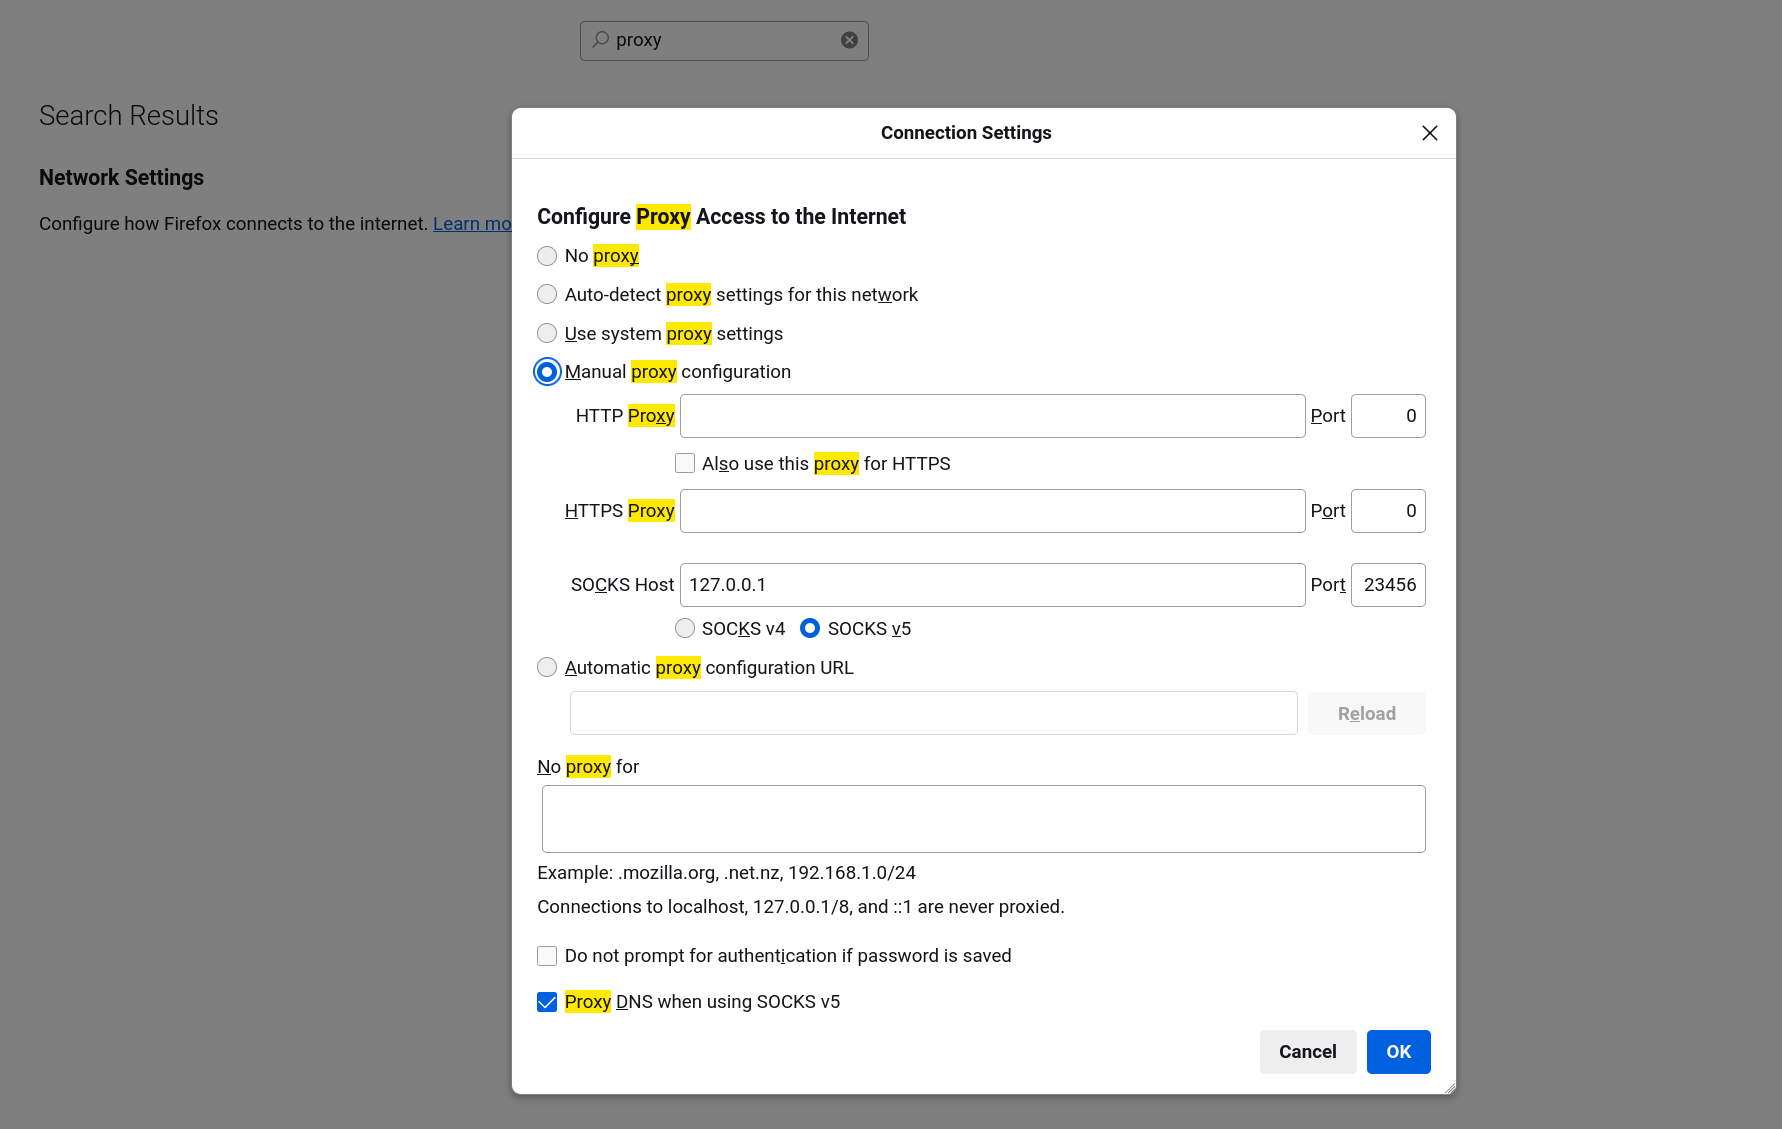
To browse the web through Earendil, we need to configure a web browser to use our Earendil SOCKS5 proxy (at localhost:30003). For Firefox this looks like:

Visit any website as you normally would, except now all your traffic is going through Earendil! You can confirm this by checking your IP address: you're properly connected if it's 62.210.93.59. That's the IP address of this tutorial's bootstrap node.
Now you can use Earendil as a web proxy to browse the internet anonymously! Feel free to share speed tests in our Discord.
Obtaining relay information safely
In the configuration above, we added a publicly available example relay that the Mel team maintains.
It is important to note that in production, Earendil relay information will not generally be publicly available. You will need to personally know a relay operator to obtain contact information out-of-band, through chat, email, or offline.
This is to ensure ban-resistance: if any client can just request relay information, attackers can simply join the network to get a list of relays, which can let them block or identify Earendil traffic.
Thus, if you want to actually ensure ban-resistance, don't use the relay we gave you above! Instead, you can come to our Discord to ask other users for help.
Last updated